 Apologies to those who are looking for one of my usual life-based missives. The fact is said life, such as it is, has taken over and I've been left flicking through photographs and recipes to find something to offer. Quite honestly, if I didn't, you'd be left with that not-so-exciting slow cooker pork sandwich recipe I'm not-that-excited about.Earlier this year when I reviewed Jennifer McLagan's Fat I noted her pumpkin and bacon soup was okay but needed something more. I liked the contrast of a silky pumpkin soup with crispy bacon crumbles, but I just thought the flavours could be a bit more.After playing a bit I came up with this recipe, based on McLaglan's recipe and others written by Trish Magwood and Molly Katzen. It's relatively quick and more than easy--the most laborious part is blitzing the soup, but really a masher would do if you want something a bit more textured. The result is a combination of sweet, smoky and savoury silkiness that's perfect in cool autumn, winter or even early spring nights.Enjoy!
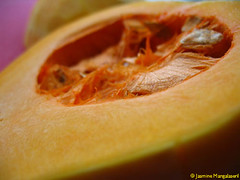
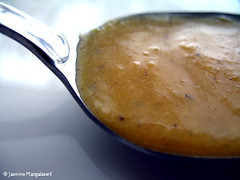 Butternut squash, bacon and apple soup
Yield: Approx 2-2.5 L (8-10c)
4-6 rashers bacon, crumbled and fried to a crisp, with its fat reserved2 onions, chopped
2 garlic cloves, minced
500g (approx 1lb) butternut squash, peeled, cored and cut into chunks
2 tart apples (Granny smith, for example), peeled, cored and cut into chunks
250ml (1c) white wine
1L (4c) vegetable stock (cold, preferably)
250ml-375ml (1-1.5c) apple cider or juice
cayenne pepper (optional)
Cook the onions until translucent in the bacon fat. Add the garlic and stir until its fragrance is released. Pour in the wine and stir until the liquid has evaporated.
Add the bacon, chunked squash and squash and give the pot a good stir. Add the apple juice and enough stock to cover. Let blurble over medium-high heat until the squash and apples are soft.
Remove from heat and mash or blitz with a blender (stick or jug) until it is as smooth as you wish. Return to the heat and add as much hot pepper as you wish. Stir, taste and balance flavours as your palate dictates.
Note: You can decide not to blitz the bacon with the soup and simply sprinkle a few shards onto the soup before serving.
cheers!
jasmine
I'm a quill for hire!
 Hmmm...
I'm not sure what I can say about this one. Last month's successful ribs experiment made me hopeful that my slow cooker wasn't an unfortunate acquisition.
Now, I'm back to doubting things.
After hearing a number of people tell me how delicious their slow cooker pulled pork sandwiches are, I thought that would be an excellent next adventure with the contraption.
Well...not so much. My friend lent me her copy of Better Homes and Gardens Biggest Book of Slow Cooker Recipes as she swears by its pulled pork recipe. Rootbeer, onions garlic and chili sauce (not chili as in the spicy hot chilli sauce you find in Vietnamese or Thai restaurants, but the uber sweet "daring" ketchup). The result?
Meh.
No doubt the meat was juicy. In and of itself it was an incredibly tender roast...but as far as a pulled pork sandwich goes, it was...meh.
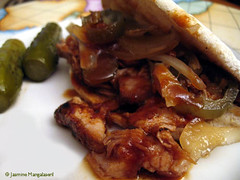
(And yes, I concede that I photographed sliced meat versions, not pulled meat versions).
I found the sauce in combination with the root beer braised meat far too sweet and uninspired. And that's me being kind.
So...where to go with this?
Given that pulled pork sandwiches are one of the few things with which the cafeteria can tempt me, I want to try this again, but with a tastier sauce.
So if you have a slow cooked pulled pork recipe you are willing to send me, please do. Assuming I get more than one, I'll select one and prepare it for another contraption post. Simply share it in comments or email me at cardamomaddict at gmail dot com.
Thanks in advance.
 Pulled Pork BBQ Sandwiches
adapted from Better Homes and Gardens Biggest Book of Slow Cooker Recipes
serves 8-101.5kg (3lb) pork roast, trimmed of excess fatsaltpepperoil, for frying2 onions, slivered1L (4c) root beer (not diet), divided6 cloves minced garlic250ml (1c) chili sauce (as mentioned in the post)1-2 Tbsp chilli-garlic sauceSprinkle the meat with salt and pepper and sear on all sides.Transfer the meat to the slow cooker. Add the onions, garlic and 250ml (1c) root beer. Cover and cook on low for 8-10 hrs or high for 4-5 hrs.Meanwhile, make the sauce by reducing 750ml (3c) rootbeer, chilli sauce and the hot sauce, by reducing the volume by half, so you get about 2 cups of sauce.When the meat is done, shred the meat with two forks and toss in the sauce. Serve on buns with the onions that the pork was cooked in.cheers!
jasmine
I'm a quill for hire!

 For those who observe, a very joyous Easter; for those who celebrate, Happy Pesach. Regardless of your beliefs, I hope all of you are enjoying all the best of this time of year.
Over here, right now, we're enjoying a lovely warm spell with temperatures more like early June than early April. My teeny little flower bed is waking up with a few icicle pansies in bloom and bleeding hearts poking throught the soil.
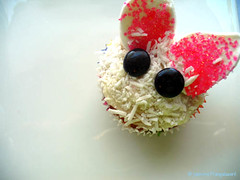
There's definitely something light and joyful in the air.There must be because I decided to make these springtime cupcakes. Cute ones, if I do say so myself...Those of you who know me or have followed this site during the past few years know that I am not a fancy or frilly cake person. Foofy cakes just aren't my thing--anything that needs more than a dusting of icing sugar, a dollop of billowy whipped cream or at worst an easy schmear of icing rarely enter, are made in or leave my kitchen.But after spying some overly cute bunny cupcakes at my fancyfooderie of choice, I knew I had to make them. Maybe it's this time of year--it was the same shop that sold the bunny bread that I deconstructed so I can make them myself (here's my step-by-step how to on making bunny shaped bread)--but again, I bought so I could see how it was put together...and eat it.
And yes, I realise the eyes on my bunnies are a tad on the maniacal side (you can use smaller candies, if you wish), but I think they add a certain je ne sais quoi leaning towards "you really aren't going to eat me, are you?"How to make fuzzy bunny cupcakes:
What you need:- cupcakes
- marshmallows
- coloured sugar (optional)
- icing
- sweetened desiccated coconut
- Smarties (or any other candy)
For the ears: cut a giant marsmallow on the diagonal and stand each half on the flat side. If you wish, you can brush the cut sides with a bit of water and then sprinkly some pink coloured sugar, with more sugar applied at the base of the ears, lightening up as to you get to the tips. Schmear the cupcake with icing and position the ears in a bunny-like way. Place appropriately coloured candies for the eyes (and nose, you wish and if the candies are small enough) and then spoon coconut over the rest of the surface to make a fuzzy face.If you wish, you can put a little white marshmallow for the bunny's teeth, but that's up to youWhile I was at it, I decided to make some nests. Again, so easy I can manage it.How to make nest cupcakes:What you need:- cupcakes
- icing
- sweetened, desiccated coconut
- candy eggs (I prefer Cadbury's mini eggs, but gummy eggs would work as well)
Lightly toast the coconut in a dry pan until most of it is lovely and golden. Set aside to coolIf your cupcakes have domed, cut off the peaks and enjoy the cook's treat. Schmear the survace with icing. Roll the outer edge of the cakelettes in the tosted coconut, leave the centre coconut free.Place the eggs in the centre of the nest.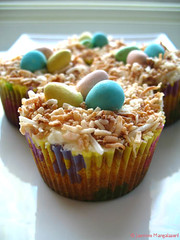 Vanilla cupcakes
Yield: 12
110g (0.75c +4tsp) cake flour
1 tsp baking powder
pinch of salt
125g (0.5c + 1Tbsp) unsalted butter, softened
125g (0.5c+ 2Tbsp) sugar (vanilla sugar, preferably)
2 eggs, lightly beaten
1 tsp vanilla extract
3Tbsp milk
Preheat oven to 200C/400F. Line a 12-bowl cupcake tin with papers.
Sift together the flour, baking powder and salt. Set aside.
Cream together the butter and sugar until light, fluffy and almost pearlescent. Mix in the eggs one at at a time (or as best as you can), followed by the vanilla.
Incorporate half the flour into the batter, scrape down the sides and then continue with the rest of the flour. Mix in the milk, one tablespoon at a time, until smooth.
Divide between the papered bowls and bake for 15-20 minutes, or until the cakelettes have risen, are golden and an inserted skewer comes out clean. Cool on a wire rack; decorate as desired.
cheers!
jasmine
I'm a quill for hire!
